To estimate the cost of building a website or an app, use our app cost calculator tool.
Over 4.52 million apps are available in Apple’s App Store, and Google’s Play Store put together, not to mention another 1.1 million apps available in Window’s and Amazon app stores.
While few of these apps get downloaded thousands of times, others languish untouched or barely used in their respective app stores.
One of the biggest reasons for this is the below-par user experience. And, that’s why app user testing holds great importance in the app development lifecycle.
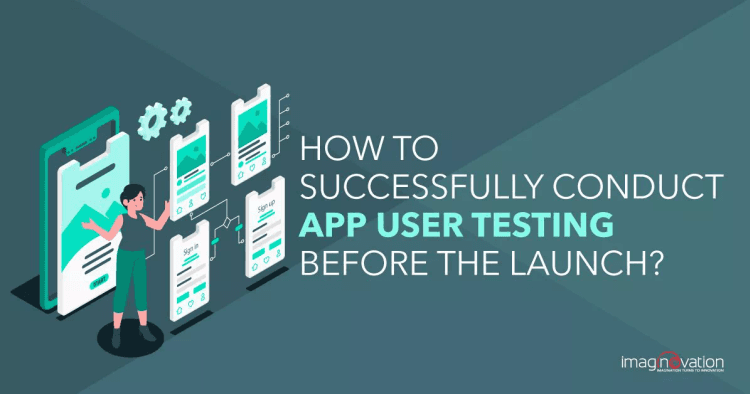
In this blog, we discuss the importance of app user testing and the steps to conduct successful testing.
Why is App User Testing Essential?

Doing a pre-launch app user test is an excellent way to understand and improve your app.
- It gives valuable insights into what works well with the users and what doesn’t
- Helps the developer avoid issues that may prove disastrous post-launch
- It validates all the assumptions about your app
- Helps you ensure that you launch an app that will be well-received
All mobile apps aim for growth in user base and profitability.
Therefore, it is apparent that you want an app that the users will buy or download for sure and use.
That’s where user testing kicks in.
User testing helps you understand how users will interact with your app. It will help you find answers to some critical questions such as:
- Is the user using the app for the same purpose you had in mind when you built it?
- Is the overall experience with the app user-friendly?
- Are users getting maximum value out of it, and if not, why not?
- Even if the user achieves the ultimate goal, is he/she happy or frustrated?
If your app helps people achieve their goals, they will like it, they will continue using it, and they will recommend it to others. Therefore, you must know how people interact with your app and use it.
Let’s take a look at how to do successful app user testing.
Critical Steps for a Successful App User Testing

Everything – from your smartphone to the car you drive, is likely to be quite different from the manufacturer’s first model. There are several iterations until the final product is launched.
User testing is paramount in all such cases. Every app that you design and develop has to be tested first. It is possible that a design that has worked so well in your mind may not work that well in real life.
Now, although there’s no one-size-fits-all approach, let’s discuss the steps critical for successful app user testing.
1. Prepare and Plan
You must first develop a clear roadmap for a usability test called the usability test plan.
Although it does not have any defined structure, a typical usability test plan can contain the following:
- Purpose and objective of the test – identify the critical functions and main objectives of your app
- Characteristics of participants/testers
- Determine the usability testing method (test design)
- Create a task-list that a typical user should be able to complete
- Test environment, equipment, and logistics
- Role of test facilitator
- What data to be collected
- Evaluation measures
- Report content and presentation
2. Define Clear User Testing Goals
Defining the exact purpose of the testing app is critical.
The method and extent to which a user test is performed depend upon the goals and objectives being pursued. They determine everything – right from your testing methods to the exact environment, tasks, and questions you ask your participants.
Depending on what stage your app is on, the user testing goals may change in its lifecycle.
For example, if you plan to conduct user testing before your app’s development phase is over, your goals will focus more on exploring and discovery.
- Try to find out what your target users need
- Which similar apps do they already use
- And, what pain points they require help with
Please note that you will not have a functioning version of your app to test during this phase.
You can use interviews with users, focus group discussions, and competitive analysis to clearly understand your target users’ needs.
User testing goals during development will focus on validation. Try to find out if users understand and enjoy your app and whether the app features meet their needs.
For this, you must develop early versions of your app, such as an MVP or Minimum Viable Product.
3. Build an MVP or Apt Working Prototype
User testing isn’t as simple as only asking people to check your new prototype or MVP and ask them to ‘give it the go-ahead.’
Instead, what you require them to do is perform specific tasks that your app is supposed to do.
For example, if you’ve built an app for an eating joint, you may need the testers to test functions like:
- Booking a table.
- Checking the menu.
- Ordering a takeaway.
- Finding reviews.
This way, you can get results based on the core functions of the app.
You won’t need the final product, but you will need a clear working example that the testers can use and structure and key elements for a fair test.
4. Select between In-person and Remote Testing
There are two ways to conduct app user testing – in-person testing and remote testing.
With in-person testing:
- You get an opportunity to create a real connection with your testers and participants and check their reactions.
- It’s easier to read somebody’s body language in person.
- In-person interactions are a little expensive.
In-person testing is often time-consuming because they involve processes like setting up a testing environment and being present for each participant session.
With remote testing:
- Be aware that it may be conducted when the budget is restricted.
- This type of testing is ideal when there is a time limitation, and there’s no need for travel and testing facilities.
- A limitation of this type of testing is that you can’t interpret your tester’s body language.
In case you opt for remote testing, then you must choose between Moderated and Unmoderated remote testing.
Moderated sessions generally offer more insights because you have the liberty to ask questions in real. If a user gets stuck on a specific process, you can redirect them or get more information about the reason for the confusion.
It would help if you had a moderator who should be present for each session. Sometimes you may receive less than accurate results when some participants may feel pressured by someone observing and asking them questions than if they were interacting with your app on their own.
In Unmoderated sessions, you don’t get the opportunity to raise any follow-up questions and redirect the participants if required.
What if any tech issues occur? Who will troubleshoot such issues or explain tasks to confused participants? These may further lead to testing sessions with less meaningful insights.
However, they do give you the additional benefit of being able to test your app in a unique context or environment.
5. Select the Test Participants
This step involves real users. One of the challenging aspects of usability testing is finding suitable participants or testers.
You may have to recruit the desired number of testers as per your test plan. It is always good to test the app with people outside the office team who are not associated with this project.
Finding the right testers who match your demographics and professional profile may take some time. The following points must be considered when selecting the testers or participants.
These participants must:
- Be representatives of the target users for whom the app is intended.
- Own a device whose OS and its version is one that is desired for the app execution.
- Be available for testing at the decided time, place, and frequency of the intended tests.
- Agree to the compensation terms that you may be offering (if any)
- Be ready to sign a usability participation consent form
The users you recruit must relate to the problems you are trying to solve.
6. Set Up the User Testing Environment
The testing method that you choose defines your testing environment and the various tools used.
Select a place free from all distractions: Loud noises, unexpected visitors, and other interruptions. You can choose a quiet conference room with doors closed so that our participants stay focused on their assigned tasks, and our recordings don’t pick up extra noises.
You can also limit the number of people present in the room to a participant, a moderator, and a note-taker. Participants can get anxious when there are watched closely.
It’s important to select the right tools and get familiar with them before starting your first session. Selecting unreliable tools or the ones that lead you to technical issues can hamper the smooth session flow, and cause frustration for you and the participant.
7. Test your “Test”
To be sure that everything goes right during the actual test, a test run is recommended. It is recommended so that it is determined whether:
- The planned time frame can be met,
- The technical setup works the way it is expected, and
- The instructions to the testers are understandable and consistent.
8. Conduct the User Test
This is the phase when the app user test is conducted in actual.
You can distribute the tasks to different participants by providing them with short scenarios. Check in the application, which is navigated through single-handed operations.
You can conduct a session that includes a set of users. You can begin by introducing yourself and explaining the whole process to the users. Let the users ask questions and perform a set of defined tasks.
Make sure you won’t disclose how many steps or how long each task takes to complete it. Ensure that the users feel comfortable with making comments and suggestions.
You can take down notes during the session while they make comments, ask questions, and make suggestions. Do include all kinds of observations.
9. Analyze and Act on the Results
Once all the tasks are done, collect all the test results.
Gather all kinds of information possible about the overall effectiveness of the app task. All this information from the usability tests must be analyzed in detail to capture meaningful inferences. This gives possible recommendations to improve the overall usability of your app.
Finally, you can ask the participants and the users what they remember about the app structure. If you can define it clearly, you can be assured that the app structure and functions are structured logically.
All findings of the usability test will provide raw data.
- Split information as – qualitative and quantitative data
- Create a summary report which should contain actionable recommendations
- Share it with all the app stakeholders.
Please remember that it’s essential to conduct app user tests often to achieve maximum benefits. If you plan in advance, these tests are very easy to set up and can easily be integrated into your app development cycle.
So keep testing, and improving, your app. App user testing is a crucial process for the success of any product or service today.
What Next? – Post Launch Testing Stage

You’ve built and launched your app. Now, before you move on to your next project, it’s essential to realize that your work isn’t quite done yet.
You need to put specific systems for your app to become successful.
All the efforts you’ve spent planning and creating an app will get you to launch it, but the time invested in post-launch activities will undoubtedly ensure you create an app user can’t live without.
Successful apps are successful because of several reasons – they evolve, exceed customer expectations, and perform functions reliably.
We’ve compiled a list of steps one must take after launching to help make your app successful.
1. Tune in Actively to Your Community Channels
It’s important to know what’s being said by the users about your app/product.
It is seen that when some users encounter a problem or have a question, they don’t necessarily reach out to app developers. They often post queries at Stack Overflow, Twitter, Facebook, or other social media platforms, to find answers or just to vent about unaddressed issues.
Specific tools like Zapier and Google Alerts are available that can monitor the web and social media for keywords related to your app. You can get instant notifications on the channel you use most.
2. Gather Precise Feedback
Ask for feedback, not just ratings, because feedback is the key to building on success. It can get challenging to engage your users without the use of proper tools.
For many native apps (mobile and desktop), tools like Apptentive make it super easy to understand customer sentiment.
All you need to do is drop in the SDK and add some code, and you’ll be able to survey your users on how they feel about your app.
You can also use user recordings to see if users’ app experience is efficient. You can quickly figure out your app's problem areas and make relevant updates without needing to spend hours interviewing users and potentially receive biased or vague feedback.
3. Test and Assess UI Usability
It isn’t easy to assess clearly how your users will interact with your app UI until you’ve launched your app. Using qualitative UI testing tools like User Experior provide you with many benefits.
Such tools can track all taps, double taps, swipes, pinches, etc., and represent every occurrence in a visual screen mock-up.
They present you with information you could not have obtained with traditional analytics. You can assess if certain gestures in your app need to be changed, if some button sizes need to be modified, how users interact with the pop-ups, etc.
4. Track the Short Sessions
Session lengths often indicate user experience. The session duration indicates a particular user’s experience with your app.
Sessions that are too short indicate that there’s something that is causing users to drop off of your app quickly. It may be an overall look and feel of your app, the UI, design, content, or something else.
Some quality analytics tools can track long and short sessions to check where and why users decide to leave the app.
5. Monitor the APIs
Many apps rely on APIs to integrate certain functionalities.
For example, Google maps rely on the location API. It’s important to know that all APIs are operating as expected. Tools like Runscope track and keep you informed of any expected and unexpected API issues.
While creating a frictionless user experience may not be easy, armed with the right tools, you can efficiently optimize your app.
Turn Your Ideas into Seamless Digital Experiences with Imaginovation
Without an effective and well-structured plan for user testing, you’ll be prone to making errors in your new app.
That’s why we can support you with app user testing before the launch of your app. If you need help bringing your ideas to life in the form of an app with a great user experience, then get in touch with us.
We are an award-winning technology company with vast experience in creating digital success stories for diverse companies. Let’s talk.


